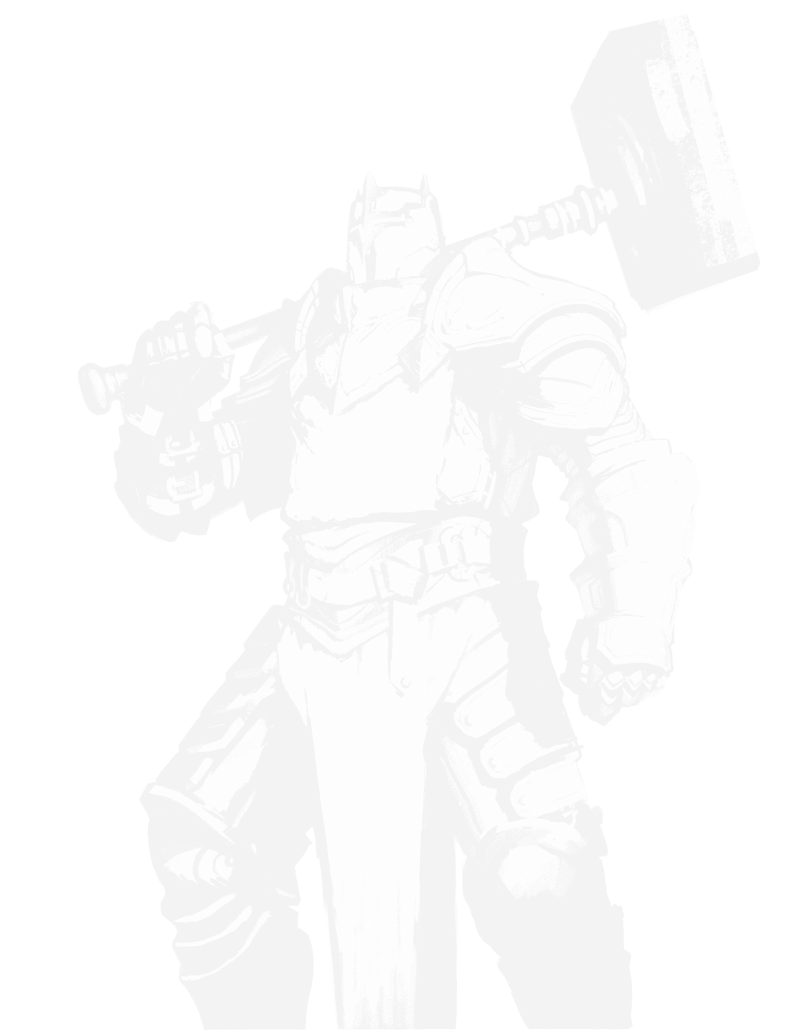


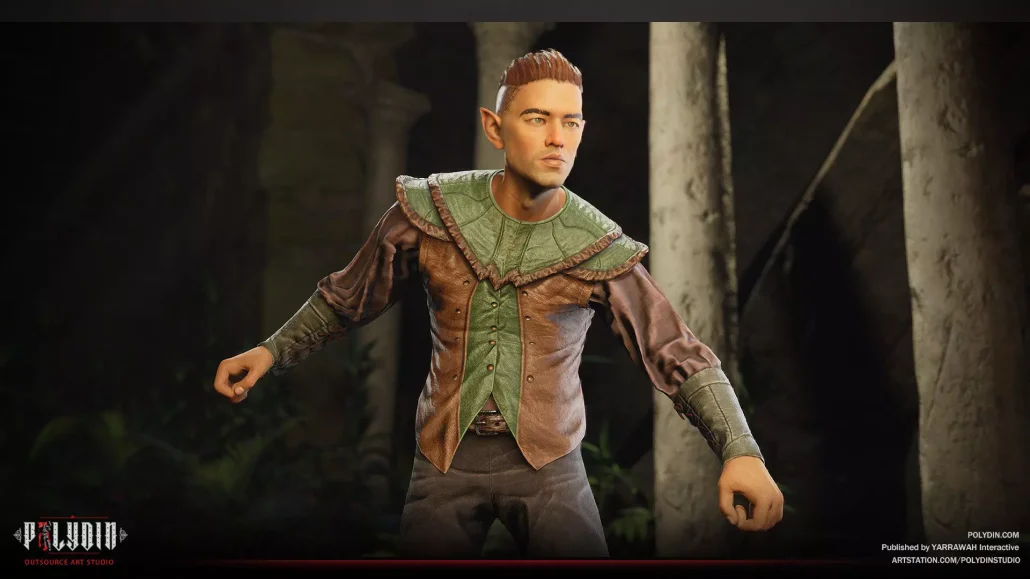
3D Character Design is a crucial aspect of modern-day game development and animation. From complex video game characters to animated films, 3D modeling plays a vital role in bringing these digital creations to life. The process of designing a three-dimensional character requires creativity, technical skill, and a solid understanding of the latest tools and techniques in the industry. Whether you’re an aspiring game developer, animator, or digital artist, 3D Character Design is an exciting and challenging field that offers endless opportunities for growth and creativity. Without further ado, let’s dive in and explore everything you need to know about this exciting field.
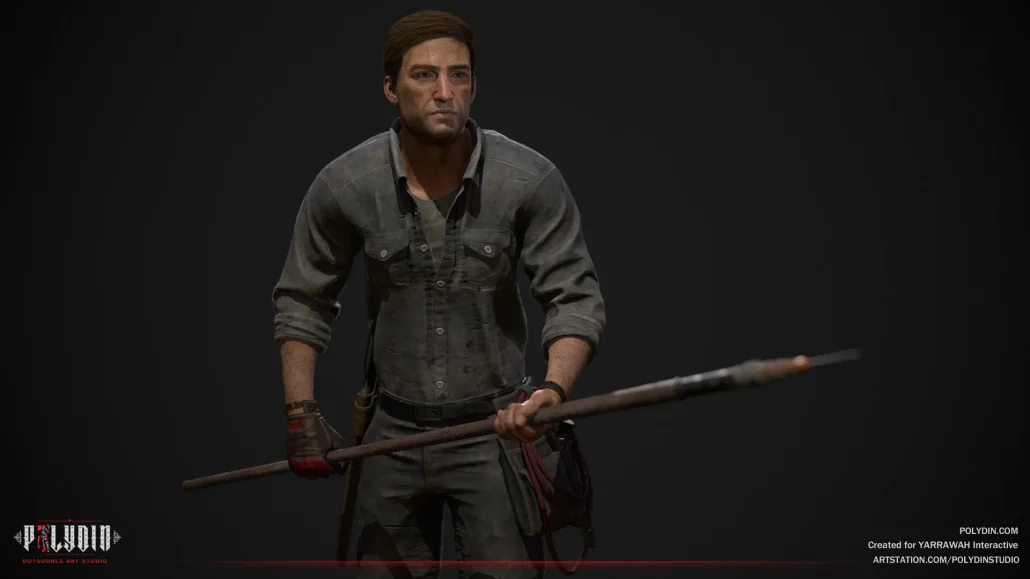
From initial concept to final rendering, the experts at Polydin Studio specialize in providing high-quality 3D character production services. If you’re looking to bring your video game or animation project to a new level, our team provides exceptional outsourced designs that are customized to your unique vision. Let us help you take your creative ideas and turn them into amazing, fully realized 3D characters.
How Does 3D Modeling Work?

3D modeling, one of the important stages of 3D character design, is a process of creating three-dimensional digital representations of objects and characters. It’s a critical aspect of many industries, including gaming, film, and animation, where the goal is to create photorealistic representations of objects and characters in virtual environments.
3D modeling involves several steps: conceptualization, creating a wireframe, adding texture, and rendering. In the conceptualization stage, artists and designers develop ideas and sketches for the 3D model. In the wireframe stage, a basic structure of the model is created using geometric shapes, such as spheres, cones, and cubes. This stage establishes the structure and form of the model.
The next step is adding texture, which involves creating a surface for the model that defines its appearance, including color, reflection, and transparency. This stage also involves mapping, where a 2D image is used to wrap around the 3D surface. Finally, the model is rendered, which is the process of generating a final image or animation of the model.
There are various techniques used in 3D modeling, including polygons, NURBS, and voxels, among others. The choice of technique depends on the desired outcome and the type of project. With the advancements in technology, 3D modeling has become increasingly accessible, and the resulting models are becoming more and more realistic. Whether you’re a beginner or an experienced 3D modeler, it’s an exciting time to be involved in this field.
What is Polygonal Modeling?

Polygonal modeling is a widely used technique and it involves constructing a character using a series of interconnected polygonal shapes, which together form the final 3D model. This technique allows for precise control over the character’s shape and form and provides the flexibility to create complex and intricate designs. The process of polygonal modeling starts with creating a low-resolution 3D model, which is then refined and sculpted into a more detailed and high-resolution model.
One of the key benefits of polygonal modeling is that it is highly customizable, allowing designers to make changes to the character’s shape, proportions, and details at any stage in the process. This makes it an ideal technique for creating 3D character design, as it allows designers to iterate and refine the design until it meets their desired specifications. Additionally, polygonal modeling can be used in various industries, from film and animation to gaming and product visualization, making it a versatile and widely applicable skill for 3D designers.
Another advantage of polygonal modeling is that it is relatively straightforward to learn and can be done using various software programs. This means that even those who are new to 3D design can quickly get up to speed and start creating high-quality 3D characters. Whether you’re a seasoned 3D designer or just starting out, polygonal modeling is a technique that is definitely worth exploring if you’re interested in creating 3D character design.
Cultural and Historical References in 3D Character Design
Incorporating cultural and historical elements into 3D character design adds depth, authenticity, and emotional resonance to a project. Designers often draw inspiration from traditional clothing, folklore, mythology, and historical events to create characters that resonate with specific audiences or tell a meaningful story. For instance, a warrior character might wear armor inspired by samurai traditions or medieval European knights, blending historical accuracy with creative embellishments to suit the fictional setting. Balancing respect for the source material with artistic freedom is crucial to avoid cultural misrepresentation or oversimplification. Research, collaboration with cultural experts, and attention to detail ensure that such references enhance the character’s appeal and authenticity.
The Psychology Behind Character Design
Creating compelling characters requires a deep understanding of human psychology. Every element of a character’s design, from their facial expressions to their clothing, plays a role in how players perceive and connect with them. Effective character design evokes emotional responses, making characters more relatable or memorable. Here’s how psychology influences character creation:
- Color Psychology
Colors are carefully chosen to reflect a character’s personality or role. For example, red may signify passion, danger, or aggression, while blue often conveys calmness or intelligence. Villains might be associated with dark, muted tones, while heroes are often depicted with vibrant, optimistic palettes. - Body Language and Silhouettes
A character’s stance or posture conveys their attitude or role in the story. Heroes often have upright, confident poses, while antagonists may have hunched or menacing stances. Silhouettes are also critical in ensuring characters are instantly recognizable, even from a distance. - Facial Features and Expressions
Subtle facial features like scars, wrinkles, or asymmetry can tell a story about a character’s background or personality. For example, a character with a soft, rounded face may appear friendly, while sharp, angular features might suggest danger or cunning.
Detailed Step-by-step 3D Character Design Process

3D character design is a complex and intricate process that involves many steps. From conceptualizing the character’s appearance modeling its 3D form, and adding the final touches, each step is critical to creating a high-quality, believable, and engaging character. The detailed step-by-step process for 3D character design typically includes the following stages:
Conceptualization
The first step in the process is determining the character’s appearance and personality. This involves creating sketches, drawings, and mockups of the character and determining its basic form, features, and movements.
Modeling
Once the concept is finalized, the next step is to create a 3D model of the character. This involves using 3D modeling software to build the character’s geometry, including its skeleton and muscles, and adding features such as its skin, hair, and clothing.
Sculpting
After the 3D model has been created, the next step is sculpting the character’s details. This involves refining the shape of the character and adding in finer details like wrinkles, pores, and skin texture.
Pose and Expression
Once the sculpting is complete, the next step is to pose the character in different positions and create different facial expressions. This allows the designer to see how the character looks from different angles and in different contexts.
Feedback and Revisions
Once the character has been fully designed, getting feedback from others is important. This can include other designers, clients, or focus groups. Based on the feedback, the designer may need to make revisions to the character to improve its overall design.
Each of these steps is critical to creating a high-quality 3D character and requires specialized skills, tools, and techniques.
Creating a 3D character design using AI

Creating 3D characters has been revolutionized dramatically ever since the introduction of AI into the world of modeling and animation. Regardless of the step in the workflow you find yourself in, from early conceptualizing to final rendering, you can always use AI to not only conserve time but also create intricate, lifelike characters smoothly. Here’s a brief guide on how to create your own 3D character using AI.
Idea and Concept
Each character design sparks from an idea or inspiration. If you find yourself struggling with the initial blueprint of your project, you can always use AI-powered generator tools like Midjourney or Stable Diffusion, which assist you in brainstorming and discovering the right personality for your character. Additionally, you can upload your rough sketches and pictures to get a refined, 3D model-inspired version.
Creating a Raw 3D Model
Once you’ve fully developed your idea, you can import the initial concept into formerly introduced programs like ZBrush, Blender, or Meshy to further enhance it. These programs enable you to use manual sculpting features, adjusting the size and proportions of your character, and finely defining structures like hands, hair, nose, and eyes.
Refining and Retopology
For refining your topology and improving your 3D character design, AI tools like ZBrush’s ZRemesher or Blender’s Quad Remesher can help you optimize the structures by reducing polygons without losing crucial details of your model. These AI tools can ensure smooth animation and easier rendering.
- UV Mapping and Texturing UV mapping tools in Blender or RizomUV automate the unwrapping process and help you navigate the cutting spots and the spaces that need more or less texture and detail efficiently.
Rigging and Animation
Now that you’ve textured your model, it’s time to bring it to life and put it into motion by rigging. AI tools like Mixamo and Cascadeur can help you with custom skeletons and create smooth motions and transitions for your animation.
Rendering and Finalizing
AI software like Blender and Autodesk Arnold assists in accelerating the process and putting your 3D character in a 2D finalized animation or video.
For post-rendering touch-ups and final perfections, you can use Topaz Gigapixel AI, Photoshop, or GIMP to enhance the final form by color correction, adjusting cinematic effects, and improving realism.
Read Also : AI in Game Development | Unleashing the Power of Intelligent Gaming
What is the Best Software for 3D Character Modeling?

3D character modeling is a complex and multi-step process that requires the right tools and software to bring a character to life. With so many options available, it can be challenging to determine which software is best for your project. Regarding 3D character design, the software you choose will depend on your specific needs and experience level. Some of the top software options for 3D character modeling include Autodesk Maya, Blender, ZBrush, and 3DS Max.
Autodesk Maya is a professional-grade software that is widely used in the film and gaming industries. It offers a comprehensive suite of tools for 3D modeling, animation, and rigging, making it a popular choice for experienced character designers. Blender is an open-source software that is a great option for beginners who are just starting out with 3D character design. It offers a wide range of features, including modeling, animation, and compositing, and is constantly updated by its active community of users.
ZBrush is a digital sculpting tool that allows you to create highly detailed and organic models. It is often used by game artists and character designers to add fine details and texture to their characters. 3DS Max is another industry-standard software that is widely used for the same purpose. It offers a robust set of tools for modeling, animation, and visual effects, making it a popular choice for professional character designers.
Ultimately, the best software for 3D character modeling will depend on your experience level, project requirements, and budget. By carefully considering your needs, you can select the software that will best help you bring your characters to to life.
How Much Does it Cost to Create a 3D Game Character?

The cost of creating a 3D game character can vary greatly, depending on the complexity and scale of the project. The main factors that determine the cost are the time and resources required to design and build the 3D model, as well as the expertise of the 3D artist. Basic projects can cost several hundred dollars on the low end, while more complex and detailed characters can cost several thousand dollars or more.
One important factor that can affect the project’s cost is the level of detail and complexity desired. Simple, low-polygon characters with basic rigging and animations will be less expensive than high-polygon characters with intricate textures, materials, and detailed animations. Additionally, the cost may be influenced by the experience and reputation of the 3D artist or studio and the technology and software used.
Another factor that can impact the cost of a 3D game character is the use of outsourcing. In many cases, game developers will opt to outsource 3D character design to specialists or studios in order to reduce costs and ensure a high level of quality. However, it’s important to carefully research and vet potential outsourcing partners to ensure that they have the expertise and experience necessary to deliver the desired results.
Ultimately, the cost of creating a 3D game character will depend on the specific needs and goals of the project, as well as the resources and expertise available. By carefully planning and budgeting for 3D character design, game developers can ensure that they have the resources and support they need to bring their vision to life.
Read Also: 3d Art Production
How Long Does it Take to 3D Model a Character?

The amount of time it takes to 3D model a character can vary greatly depending on several factors such as the complexity of the character design, the experience level of the modeler, and the tools and software being used. On average, a simple character model can take anywhere from a few days to a couple of weeks to complete, while a more complex character model can take several months or even longer to finish.
Another factor to consider is the purpose of the character model. If it is for a short animation or a background character in a video game, it may not need to be as detailed as a main character or a lead character in a feature-length animation. This can significantly impact the time it takes to create the model.
In addition, the modeling process can be made more efficient by using 3D character design software that has robust tools for automating tasks and streamlining the modeling process. However, the quality of the final model will ultimately depend on the skills and experience of the modeler.
Ultimately, the amount of time it takes to 3D model a character will depend on the specific requirements of the project, the skills of the modeler, and the tools and software being used. With the right tools and experience, it is possible to create high-quality 3D character models in a relatively short amount of time.
Design 3D Characters for Augmented Reality Applications
Designing 3D characters for augmented reality (AR) requires balancing realism with performance. Characters must be detailed enough to feel immersive but optimized so they can run smoothly on AR-enabled devices like smartphones, AR glasses, and headsets. Designers often use low-poly modeling combined with high-quality textures to achieve this balance. Interactivity is also essential. Characters should be able to respond to user actions or environmental triggers, whether that means changing expressions, performing animations, or adapting to real-world objects through AR tracking. Successful AR character design blends artistry with technical precision to create engaging, lifelike experiences.
Future Trends in 3D Character Modeling
The future of 3D character modeling is moving toward higher realism and greater accessibility. With tools like Unreal Engine’s MetaHuman Creator, even small studios can produce photorealistic characters that once required Hollywood-level budgets. Stylization remains strong as well, especially in gaming and marketing, where unique aesthetics stand out. Procedural generation, real-time rendering, and cross-platform compatibility are becoming standard. Characters are also being designed to function across multiple realities—games, AR apps, and virtual spaces—ensuring long-term value and reuse in different contexts.
AI and Machine Learning in Automating Character Creation
AI is playing a growing role in character design by automating repetitive or technical tasks. Machine learning tools can generate textures, rig characters for animation, and even create entire variations of character models. This speeds up production while giving artists more time to focus on creativity and storytelling. AI-driven facial animation and motion capture are also becoming widely accessible, reducing the need for large studios or specialized equipment. However, while automation accelerates workflows, human creativity remains critical for defining unique character styles and personalities.
Integrating 3D Characters into Virtual Environments
Once created, 3D characters need to be seamlessly integrated into their digital worlds. This involves optimizing models for lighting, physics, and interactivity within game engines like Unity or Unreal. In AR, integration requires characters to interact naturally with real-world surroundings, such as casting shadows on physical surfaces or reacting to spatial mapping. For VR, immersion is key—characters must be scaled, animated, and responsive in ways that feel believable to users. Proper integration ensures that characters don’t just exist in a space but enhance the overall user experience.
Opportunities in AR and VR for Next-Gen Models
The growing AR and VR markets present vast opportunities for 3D character creators. From virtual influencers and brand mascots to realistic training simulations and immersive storytelling, demand for lifelike characters is expanding. As hardware improves, users will expect more realistic, interactive, and emotionally engaging digital beings. This opens doors for designers who can blend technical innovation with creative vision, shaping the next generation of virtual experiences.
Five Steps of Character Modeling

The process of creating a 3D character can be broken down into five distinct steps: concept art, modeling, rigging, texturing, and animation. Each step builds upon the previous one to create a complete and fully functional 3D character.
Concept Art
In this step, the artist creates a 2D representation of the character that serves as the foundation for the rest of the process. The concept art should include details such as the character’s appearance, clothing, and posture.
Modeling
In this step, the 2D concept art is transformed into a 3D model using polygonal modeling techniques. The model is constructed using a series of interconnected shapes and vertices. The goal is to create a model that accurately captures the character’s design while also being optimized for animation and real-time rendering.
Rigging
Once the model is complete, it needs to be rigged. This is the process of creating a skeleton for the character and attaching it to the model. The rigging allows the character to be moved and animated.
Texturing
In this step, the 3D character design is given a visual appearance by adding texture maps, such as diffuse, normal, and specular maps. Texturing is critical for giving the character a believable and appealing look.
Animation
In the final step, the character is brought to life through animation. This involves defining the character’s movements and actions and ensuring they are consistent with the concept art. The end result is a fully animated 3D character that can be used in a video game or animated film.
By following these five steps, 3D character designers can create high-quality, detailed, and expressive characters that bring a game or film to life.
Challenges of 3D Character Design for Video Games
Creating 3D character designs for video games comes with its own set of challenges. Here are some of the common challenges that game developers and character artists face in the process:
- Technical Constraints: 3D character design in video games must adhere to technical limitations such as polygon count, texture resolution, and rigging requirements. Artists need to optimize their designs to ensure that characters can be rendered and animated efficiently within the game engine.
- Artistic Style Consistency: Maintaining a consistent artistic style across different characters within a game can be challenging. Characters need to fit within the overall visual direction of the game while still having unique and distinguishable features that reflect their personality and role.
- Character Functionality: Game characters need to be designed with their intended gameplay functionality in mind. They should have clear silhouettes, readable animations, and appropriate proportions to ensure they can be easily recognized and interacted with by players.
- Animation Rigging: Rigging is the process of creating a digital skeleton and control system for a character to enable realistic movement and animation. Designing characters that can be rigged effectively, with proper joint placement and deformations, requires technical expertise and an understanding of animation principles.
- Performance Optimization: Characters in video games need to perform well in real-time rendering, especially in complex and visually demanding scenes. Optimizing character models, textures, and animations without sacrificing visual quality is a constant challenge to ensure smooth gameplay experiences.
- Character Customization: Many games offer character customization options, allowing players to personalize their avatars. Designing characters with customizable features while maintaining visual coherence and flexibility can be a complex task, requiring careful planning and implementation.
- Iterative Design Process: The iterative nature of game development often means that character designs evolve over time based on feedback and testing. Character artists need to be flexible and open to revisions and adjustments as they collaborate with the development team to achieve the desired aesthetic and gameplay goals.
Rigging and Skinning 3D Character Models
Rigging involves creating a digital skeleton for a 3D character model by placing bones or joints at key points of articulation. These bones define the character’s structure and movement capabilities, enabling animators to create realistic movement and expressions.
Skinning, also known as weighting or enveloping, attaches the character model’s vertices to the rig’s bones. This process ensures that when the rig is animated, the character’s mesh moves smoothly and convincingly, simulating natural movement and deformation of the character’s skin and muscles.
Inverse kinematics (IK) allows animators to control the movement of a character’s limbs indirectly by manipulating the end effector, such as a hand or foot. This technique facilitates more natural and intuitive animation control, particularly for complex movements like reaching, grabbing, or walking.
Blend shapes, or morph targets, are used to create facial expressions and deformations in 3D character models. By sculpting and animating different blend shapes, animators can achieve a wide range of facial expressions, emotions, and lip-syncing movements.
Control rigging simplifies the animation process by creating custom control objects that allow animators to manipulate the character’s rig and keyframe animations easily. This technique improves workflow efficiency and facilitates more precise animation control.
How do 3D characters differ from 2D ones?
3D characters differ from 2D ones in 5 majors ways:
- Dimensionality: 3D characters are three-dimensional, consisting of height, width, and depth, whereas 2D characters are two-dimensional, with only height and width. This allows 3D characters to be viewed from multiple angles and perspectives, giving them a sense of depth and realism that 2D characters lack.
- Complexity: 3D characters tend to be more complex in terms of modeling, rigging, and animation compared to 2D characters. Creating a 3D character involves sculpting a detailed mesh, rigging it with a skeleton, and skinning it to deform realistically during animation, whereas 2D characters are typically created using flat shapes and sprites.
- Animation Possibilities: 3D characters offer greater freedom and versatility in animation, allowing for a wider range of movements, expressions, and interactions with the environment compared to 2D characters. 3D characters can walk, run, jump, and interact with objects in a more natural and dynamic way, whereas 2D character art is limited to predefined animations and poses.
- Rendering: 3D characters are rendered using three-dimensional graphics techniques, such as ray tracing and shading, to create realistic lighting, shadows, and textures. In contrast, 2D characters are rendered using flat colors and simple shading techniques, resulting in a more stylized and cartoon-like appearance.
- Interaction with Environment: 3D characters can interact with three-dimensional environments in a more immersive and interactive way, navigating through spaces, picking up objects, and interacting with other characters and elements in the scene. 2D characters, on the other hand, are typically confined to a two-dimensional plane and have limited interaction with their surroundings.
Essential Skills for 3D Character Modeling
Creating 3D character models requires a range of skills to bring virtual characters to life. Here are some essential skills for 3D character modeling:
- 3D Modeling Software: Proficiency in using 3D modeling software is crucial. Popular software packages include Autodesk Maya, Blender, ZBrush, and 3ds Max. Knowledge of modeling tools, sculpting techniques, and polygonal manipulation is essential for creating character meshes.
- Anatomy and Form: Understanding human and animal anatomy is vital for creating believable and anatomically accurate character models. Knowledge of proportions, muscle structure, bone structure, and how they interact is crucial for achieving realistic results.
- Sculpting and Texturing: Sculpting software like ZBrush allows artists to add finer details and refine the shape of characters. Texture painting skills are also important to create realistic skin, hair, clothing, and other surface details.
- Topology and Edge Flow: Proper topology is essential for good deformation and animation of character models. Knowledge of edge flow, proper placement of loops, and efficient polygon distribution helps ensure that characters can deform naturally during animations.
- UV Mapping: UV mapping involves unwrapping the 3D model onto a 2D plane to create texture coordinates. Understanding how to efficiently unwrap and layout UVs is important for applying textures and materials accurately to the character model.
- Rigging and Skinning: Rigging is the process of creating a digital skeleton and control system for a character, allowing it to be animated. Skinning involves assigning weights to the character’s mesh to define how it deforms with the underlying skeleton. Knowledge of rigging and skinning techniques is necessary for character animation.
- Shading and Materials: Understanding shading and material creation is important for achieving realistic and visually appealing character appearances. Knowledge of shader networks, material properties, and texture mapping techniques is crucial for creating various surface materials like skin, clothing, and accessories.
- Attention to Detail: Paying attention to details, such as small imperfections, wrinkles, and other surface details, can add realism and depth to character models. Having an eye for detail and the ability to capture the unique characteristics of different characters is important.
- Collaboration and Adaptability: Character modelers often work closely with other team members, such as concept artists, animators, and game designers. Strong communication and collaboration skills are necessary to understand and incorporate feedback into the character design process.
- Continuous Learning: The field of 3D character modeling is constantly evolving, with new techniques, tools, and software updates. Staying updated with the latest industry trends, learning new software features, and improving artistic skills through continuous learning is crucial for growth as a character modeler.
Case Studies of Successful 3D Character Designs
- Kratos from “God of War” (2018): The redesign of Kratos, the iconic protagonist of the “God of War” series, for the 2018 installment is a notable example of successful 3D character design. The character underwent a significant transformation, evolving from a vengeful, rage-filled Spartan warrior to a more mature and nuanced portrayal of fatherhood. The attention to detail in Kratos’ facial expressions, body language, and battle animations contributed to the emotional depth and realism of the character, earning critical acclaim and widespread praise from fans.
- Aloy from “Horizon Zero Dawn”: Aloy, the skilled hunter and protagonist of “Horizon Zero Dawn,” is another example of a successful 3D character design. Her distinctive appearance, including her red hair, tribal attire, and tribal markings, reflects the game’s post-apocalyptic world and tribal societies. Aloy’s animations, from her agile combat maneuvers to her interactions with wildlife and NPCs, convey her resourcefulness, intelligence, and determination, making her a compelling and relatable character for players.
- Nathan Drake from the “Uncharted” Series: Nathan Drake, the charming and adventurous protagonist of the “Uncharted” series, is celebrated for his iconic appearance and charismatic personality. The 3D character design of Nathan Drake combines rugged good looks, expressive facial animations, and fluid movement animations to bring the character to life. From perilous cliffhangers to intense firefights, Nathan Drake’s animations capture the thrill of exploration and adventure, making him one of gaming’s most beloved characters.
What is a 3D character animator?
A 3D character animator is a specialized artist responsible for bringing 3D characters to life through movement and expression. This role involves creating and manipulating digital character animations, including walking, running, jumping, fighting, and emoting, to convey personality, emotion, and narrative within a 3D environment design.
Key responsibilities of a 3D character animator include:
- Keyframe Animation: Using animation software such as Autodesk Maya, Blender, or Adobe Animate, 3D character animators create animations through keyframe animation techniques. They manually pose the character at key moments in time, creating a sequence of poses that define the motion of the character over time.
- Motion Capture Integration: In some cases, 3D character animators may work with motion capture technology to record real-life performances and translate them into digital animations. This process involves capturing the movement of actors using specialized cameras and sensors and applying that data to digital character rigs.
- Facial Animation: 3D character animators also focus on animating facial expressions and lip-syncing to synchronize character dialogue with mouth movements. This involves manipulating the facial rig of the character to convey emotions, expressions, and speech accurately.
- Collaboration: 3D character animators often collaborate closely with other members of the development team, including character designers, riggers, and game designers, to ensure that animations align with the overall artistic vision and gameplay requirements of the project.
Overall, 3D character animators play a crucial role in bringing characters to life in video games, animated films, television shows, and other forms of digital media, using their artistic talent and technical skills to create compelling and immersive character performances.
Benefits of Game Art Outsourcing
Game art outsourcing is becoming increasingly popular in the gaming industry as it offers several benefits to game developers. Outsourcing allows game developers to focus on their core competencies while still getting access to the best 3D character design and other game art resources. The benefits of game art outsourcing include the following:
Access to a wider pool of talent
By outsourcing game art, game developers have access to a larger pool of talented and skilled artists. This allows them to find the best fit for their project without being limited by the talent available in-house.
Cost savings
Outsourcing game art can be more cost-effective than hiring in-house artists. This is because outsourcing companies often have lower overhead costs and can provide more competitive rates.
Faster turnaround times
Game art outsourcing companies often have a larger pool of artists, which means that projects can be completed faster. This is especially important for game developers who are on a tight deadline.
Improved quality
By outsourcing game art, game developers can ensure that they are getting the best possible quality. This is because outsourcing companies often have specialized artists who are experts in their respective fields.
Increased focus on core competencies
By outsourcing game art, game developers can focus on their core competencies, such as game design and development. This allows them to put their energy and resources into areas where they can have the biggest impact.
Overall, game art outsourcing is a valuable strategy for game developers who want to achieve their goals while staying focused on their core competencies. With the benefits mentioned, it’s no wonder why more and more game developers are turning to outsourcing as a means to achieve their goals, especially in 3D character design.
Benefits of Outsourcing Character Design Services
Outsourcing character design services can bring several benefits to businesses and individuals involved in creative projects. Whether it’s for video games, animation, or other forms of media, outsourcing character design offers unique advantages that contribute to the overall success of the project. Here are some key benefits:
Access to specialized expertise
Outsourcing allows you to tap into a pool of talented character designers who specialize in their craft. These professionals have extensive experience and skills in creating captivating and visually appealing characters. By outsourcing, you gain access to their expertise and benefit from their creative vision and technical knowledge.
Cost-effectiveness
Outsourcing character design can be more cost-effective compared to hiring an in-house team. It eliminates the need for extensive recruitment processes, training, and maintaining a dedicated team of artists. Outsourcing also allows you to choose from a range of pricing models, such as fixed project rates or hourly rates, which can be tailored to your specific budget and requirements.
Time efficiency
Character design is a time-consuming process that requires attention to detail and artistic finesse. Outsourcing this task frees up your internal team’s time and resources, allowing them to focus on other core aspects of the project. With a dedicated team of character designers working on the project, you can ensure timely delivery without compromising quality.
Fresh perspectives and creativity
Collaborating with external character designers brings fresh perspectives and creative ideas to the table. They can offer unique insights and innovative approaches to character design, bringing new life and originality to your project. This diversity of ideas can enhance the overall quality and appeal of your characters.
Scalability and flexibility
Outsourcing allows you to scale your character design services based on project requirements. Whether you need a small team for a short-term project or a larger team for a long-term engagement, outsourcing offers the flexibility to adapt to changing demands. It provides the agility to ramp up or down resources as needed, ensuring efficient project management.
Process of Professional Character Design Services

The process of professional character design services involves a series of steps and considerations to ensure the creation of compelling and visually appealing characters that align with the client’s vision and project requirements. Here is an overview of the typical process:
Project Discovery
The character design process begins with a thorough understanding of the project’s objectives, target audience, and overall aesthetic requirements. The character designer collaborates closely with the client to gather relevant information, such as character descriptions, personality traits, and backstory, to shape the creative direction.
Concept Development
Based on the project brief, the character designer starts the concept development phase. This involves brainstorming ideas, sketching initial character designs, and exploring different visual styles. The designer creates rough drafts and presents them to the client for feedback and approval.
Refinement and Iteration
Once the initial concepts are approved, the character designer refines the chosen design by adding details, exploring variations, and incorporating client feedback. This iterative process involves multiple rounds of revisions to ensure that the character aligns with the client’s vision.
Design Finalization
After the character design is refined, the designer proceeds to finalize the artwork. This includes creating a detailed illustration or model, defining color schemes, and adding textures and finer details. The final design is presented to the client for approval.
Delivery of Assets
Once the character design is approved, the designer prepares the final deliverables. This may include high-resolution artwork files, 3D models, or a character sheet with detailed specifications. The assets are provided in the required formats for seamless integration into the client’s project.
Collaboration and Communication
Throughout the process, effective communication between the client and the character designer is crucial. Regular updates, feedback sessions, and clear channels of communication ensure that the project stays on track and meets the client’s expectations.
Revisions and Feedback
In some cases, revisions may be requested even after the final design is delivered. The character designer accommodates these revisions and ensures that the client is satisfied with the final result.
Top styles for 3D Character Design
3D character design is a crucial aspect of game development, contributing significantly to the player’s immersion and connection with the game world. Several styles have emerged as dominant in the industry, each with unique characteristics and applications:
Realistic Style
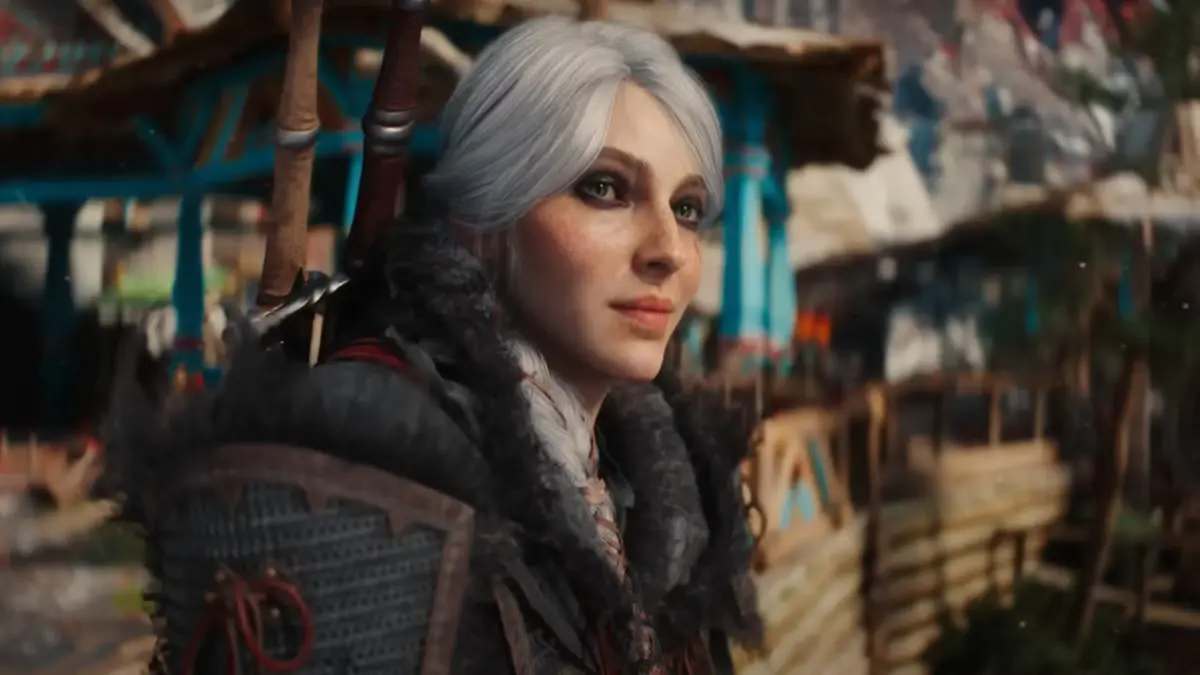
Realistic character design aims to closely mimic real-life human features, movements, and proportions. This style is prevalent in AAA games and simulations where believability and immersion are paramount. Games like “The Last of Us” and “Red Dead Redemption” exemplify this approach, featuring characters with lifelike skin textures, detailed facial expressions, and nuanced animations. The realism helps players relate to the characters on a deeper emotional level, making the narrative more impactful.
Cartoon Style
Cartoon-style characters are exaggerated and stylized, often featuring oversized heads, large eyes, and expressive faces. This style is popular in family-friendly and casual games such as “Ratchet & Clank” and “Fortnite.” The exaggerated features allow for more expressive animations and can make the game more visually engaging and accessible to a broader audience. The cartoon style often employs bright, vibrant colors and simpler textures, contributing to a fun and approachable aesthetic.
Stylized Realism
Stylized realism strikes a balance between realism and exaggeration. Characters are designed with realistic proportions and movements but are given a unique artistic flair that differentiates them from purely realistic designs. Games like “Overwatch” and “Dishonored” use this style to create distinctive and memorable characters that fit within their unique worlds while maintaining a level of believability. This style allows for creative freedom while retaining a grounded feel.
Anime Style
Anime-inspired 3D characters are characterized by sharp features, large eyes, and often intricate hairstyles. This style is prevalent in Japanese games and games inspired by anime, such as “Final Fantasy” and “Genshin Impact.” The anime style brings a distinct aesthetic that appeals to fans of the genre, combining expressive characters with dynamic, often exaggerated animations. The visual appeal of anime characters can be a significant draw for players who appreciate this art form.
Low-Poly Style
Low-poly character design simplifies the geometry of characters, using fewer polygons to create a more abstract and retro look. This style was born out of the limitations of early 3D graphics but has seen a resurgence in indie games for its nostalgic charm and unique aesthetic. Games like “Minecraft” and “Untitled Goose Game” utilize low-poly characters to great effect, emphasizing gameplay and creativity over visual fidelity. The simplicity of the design also allows for more efficient rendering and performance.
The Importance of Storytelling in Character Design
Great character design goes beyond aesthetics—it’s about embedding storytelling into the very essence of a character. Every detail should contribute to the narrative, creating a seamless connection between the character and the world they inhabit.
- Visual Hints to Backstory
A character’s attire, accessories, or scars can hint at their past. For instance, a knight’s weathered armor may suggest countless battles, while a thief’s mismatched clothing might reflect a life of hardship. - Connection to the Game’s World
Characters need to feel like they belong in their environment. A futuristic soldier, for example, should have gear that reflects advanced technology, while a medieval mage might wear robes with intricate, era-appropriate patterns. - Player Engagement Through Depth
Characters with layered personalities and detailed designs invite players to invest emotionally. Players are more likely to care about a character’s journey when their design complements their narrative arc.
The Impact of Cultural Diversity on Character Design
In today’s globalized world, cultural diversity is more important than ever in character design. Reflecting different cultures not only adds depth to a game but also ensures inclusivity and relatability for a wider audience.
- Authentic Representation
Designers research cultural traditions, clothing, and symbolism to ensure authenticity. For instance, a samurai character should reflect accurate Japanese design elements, while a character from the Maasai tribe might wear traditional beadwork and fabrics. - Avoiding Stereotypes
While cultural influences are essential, designers must avoid reducing characters to clichés. Instead of relying on overused tropes, they can focus on nuanced, multifaceted portrayals that respect cultural richness. - Broadening Audience Appeal
Games with culturally diverse characters resonate with global audiences, creating a sense of inclusion. Titles like Overwatch and Assassin’s Creed have been celebrated for their diverse casts, enhancing their appeal across regions.
Which type of character modeling is the best?
Determining the “best” type of character modeling depends on various factors, including the game’s genre, target audience, and artistic vision. Each modeling approach has its strengths and is suited to different contexts:
- Realistic Modeling: Ideal for narrative-driven games where immersion and emotional connection are critical. Realistic models are best for games that aim to deliver a cinematic experience and where detailed character interactions are essential.
- Cartoon Modeling: Best suited for casual, family-friendly games where accessibility and expressiveness are important. Cartoon models can be more flexible in their animation and appeal to a wide age range.
Stylized Realism: Perfect for games that want to stand out visually while maintaining a level of believability. This style allows for creative freedom and distinctive designs, making characters memorable and unique. - Anime Modeling: Ideal for games targeting fans of anime and manga. The unique visual style can attract a dedicated fanbase and lend a specific cultural aesthetic to the game.
Low-Poly Modeling: Great for indie games or projects with limited resources. Low-poly models can evoke nostalgia and provide a distinct visual style that sets a game apart from high-fidelity AAA titles. - Ultimately, the best type of character modeling is one that aligns with the game’s overall vision and effectively enhances the player’s experience.
Best Studios for Character Design in 2024
Polydin Studio
Positioned as a go-to partner for both Indie and AAA developers, Polydin Studio excels in enhancing gaming projects with skillful character design. Specializing in concept art, character modeling, animation, and more,we at Polydin are committed to delivering top-notch character designs that captivate audiences and enhance gaming experiences.
N-iX
With over a decade of experience, over 2200 softwareexpers and partnerships with industry giants such as Bosch, Seiemns and Ebay, N-iX Game & VR Studio offers comprehensive character design services that bring games to life. Their expertise in creating memorable characters for a wide range of platforms makes them a reliable partner for developers seeking excellence in character design.
Kevuru Games
Kevuru Games is a leading character design studio with over a decade of industry experience with headquarters in Kyiv, Ukraine. Their team of 300+ talented artists and developers specializes in crafting captivating characters that enhance gaming worlds. From AAA titles to indie gems, they’re dedicated to exceeding the customer’s expectations and bringing their vision to life. Join us at Kevuru Games as we elevate your game with our unmatched character design expertise.
AAA Game Art Studio
AAA Game Art Studio, headquartered in Europe, is renowned for its expertise in character design within the gaming industry. With a distinguished senior team boasting over two decades of collective experience, the studio stands as a reliable partner for character design outsourcing needs. Their commitment to delivering exceptional quality within specified timelines underscores their professionalism and dedication to client satisfaction. Specializing in a wide range of character design styles and sizes, AAA Game Art Studio offers comprehensive services covering character creation, concept design, and illustration. Their flexible production pipeline and efficient management ensure seamless communication and adherence to project requirements.
Jumbla
Jumbla, a globally recognized creative production company, excels in character design within the realms of 2D and 3D animation, motion graphics, and illustration. With studios in the UK and Australia, Jumbla collaborates with leading brands, local businesses, and creative agencies worldwide. Since its inception in 2011, Jumbla has cultivated a talent-driven team renowned for its creative ambition and client-focused approach.
Equipped with industry-leading creatives, writers, producers, and sound designers, Jumbla delivers polished scripts, bespoke soundtracks, and captivating visual content. With a diverse team of full-time designers, illustrators, animators, and motion graphics artists, Jumbla ensures every project meets the highest standards of creativity and quality. Led by experienced creative directors, Jumbla’s team is committed to providing excellent client service and delivering industry-leading creative execution.
3D Character Design Services with Polydin Studios
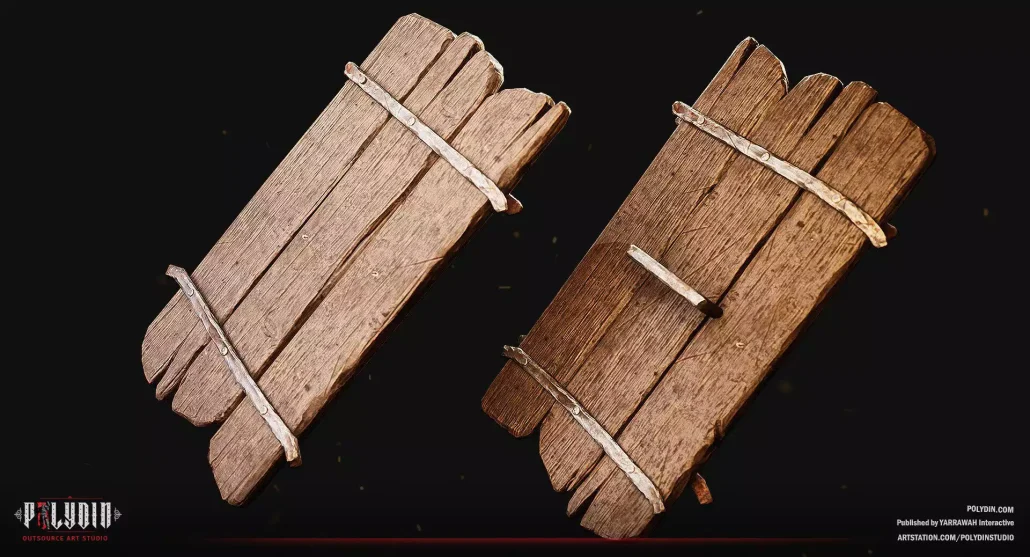
3D Character Design services provided by Polydin Studios offer a range of benefits for game developers. By outsourcing the design process to experienced professionals, you can ensure that your characters are high quality and meet your specifications. This can save you time, resources, and money, allowing you to focus on other aspects of game development. Additionally, working with a specialized company like Polydin Studios means that you have access to our expertise and knowledge, which can help you bring your game to life in a way that would not be possible if you relied only on your resources. Whether you need a single character designed or a full cast of characters, Polydin Studios can help you achieve your goals with their 3D Character Design services at competitive prices.
Why is Collaboration Important in Character Design?
Collaboration is a fundamental aspect of character design in the modern gaming industry. It brings together various creative minds, including game designers, writers, concept artists, and 3D character artists, to collectively shape a character that seamlessly fits into the game’s narrative and world. Effective collaboration ensures that the character’s design aligns with the game’s overall vision and the intended player experience.
It allows for the exploration of diverse ideas, ensuring that the character’s personality, appearance, and role in the game are well-defined and consistent. Collaboration also facilitates problem-solving, as team members can provide valuable feedback and make adjustments to improve the character’s design throughout the development process.
Best Ways to Collaborate with 3D Character Game Artists
Collaborating with 3D character game artists involves clear communication and a shared understanding of the character’s concept. The process typically begins with concept art and design discussions to establish the character’s visual style, personality, and backstory. Regular meetings and feedback sessions between the design and art teams are essential to refine the character’s 3D model continuously. Modern tools like 3D modeling software and digital sculpting allow for real-time collaboration, enabling artists to create detailed character models that align with the established concept. Effective collaboration also includes considering technical constraints, such as rigging and animation requirements, to ensure that the character functions seamlessly within the game world.
How Does 3D Character Modeling Work for Modern Game Development?
3D character modeling is a crucial component of modern game development, enabling the creation of lifelike and dynamic characters. It typically involves several stages, starting with the creation of a 3D mesh that defines the character’s basic shape. This mesh is then refined to add details, textures, and materials, bringing the character to life. Rigging and skinning follow, allowing the character to move realistically through animations.
In modern game development, character models often undergo optimization to ensure they run smoothly on various hardware platforms. Advanced techniques such as photogrammetry and motion capture may also be used to enhance realism. Throughout this process, collaboration between artists, designers, and animators is critical to ensure that the character model aligns with the game’s artistic vision and functions seamlessly within the gameplay mechanics.
Marketing Impact of 3D Character Design
The impact of 3D character design on marketing is profound, influencing brand identity and customer engagement. Well-crafted 3D characters have the potential to become iconic representations of a brand, enhancing recognition and recall. Through visually appealing and relatable characters, companies can establish a more emotional connection with their audience, fostering brand loyalty. Moreover, 3D characters allow for versatile marketing campaigns, enabling dynamic storytelling across various platforms.
From social media to advertisements, the visual appeal of 3D characters can captivate audiences, leaving a lasting impression and driving consumer interest. As technology advances, the interactive nature of 3D characters in marketing campaigns, such as augmented reality (AR) applications, opens new avenues for immersive and memorable brand experiences.
In-house 3D Character Design vs. Outsourcing
The decision between in-house 3D character design and outsourcing carries significant implications for a company’s creative process and resource allocation. Opting for in-house design provides greater control and immediate collaboration between the design team and other departments. It fosters a sense of ownership and alignment with the brand’s vision but may demand substantial investments in talent and infrastructure. On the other hand, outsourcing offers access to specialized expertise without the burden of long-term commitments, potentially reducing costs.
It provides flexibility in scaling resources based on project needs and allows companies to tap into a global pool of creative talent. However, effective communication and coordination become critical in ensuring that outsourced designs align seamlessly with the brand’s identity. Ultimately, the choice depends on factors such as project scale, budget considerations, and the desired level of control over the creative process.

The Role of 3D Character Design in Animation
In animation, 3D character design serves as the foundation upon which compelling stories and immersive worlds are brought to life. Characters are the focal point of many animations, driving narratives, evoking emotions, and captivating audiences. Through meticulous 3D character design, animators can craft personalities that resonate with viewers, whether they’re endearing heroes, menacing villains, or quirky sidekicks. The design of characters influences every aspect of animation, from their appearance and movements to their interactions with other elements in the scene.
The Importance of Creating Visually Appealing and Expressive Characters
Visually appealing and expressive characters are essential in animation for several reasons. Firstly, they serve as the primary means of engaging audiences and conveying storytelling elements. Characters with distinctive designs and personalities are more memorable and can leave a lasting impression on viewers. Additionally, expressive characters enhance the emotional impact of animations, allowing audiences to empathize with their struggles, triumphs, and journeys. Whether through subtle facial expressions or dynamic body language, well-designed characters can evoke a wide range of emotions and create immersive storytelling experiences.
How 3D Character Design Aligns with the Requirements of Animation
3D character design is uniquely suited to meet the requirements of animation due to its flexibility, versatility, and realism. Unlike traditional 2D character design, which is limited by flatness and static imagery, 3D character design allows for dynamic movement, intricate details, and lifelike interactions with the environment. Animators can manipulate 3D models in real-time, adjusting poses, expressions, and gestures to convey specific emotions and actions.
Furthermore, advancements in 3D rendering technology enable animators to achieve stunning visual effects, realistic lighting, and seamless integration of characters into complex scenes. By leveraging the capabilities of 3D character design, animators can push the boundaries of creativity and storytelling in animation.
What makes a 3D character different?
3D characters differ from their 2D counterparts in several key ways, each contributing to the depth and realism they bring to a game:
Depth and Volume
3D characters have depth and volume, allowing them to be viewed and interacted with from any angle. This three-dimensionality enables more complex animations and interactions within the game world, providing a more immersive experience.
Detailed Texturing
3D characters can be textured with detailed, realistic materials that react to lighting and environmental conditions. This level of detail enhances the realism and believability of the character, making them appear as part of the game world rather than just an overlay.
Complex Animations
The use of skeletal rigs and advanced animation techniques allows 3D characters to move in lifelike ways. This includes complex facial expressions, natural movements, and dynamic interactions with other objects and characters in the game.
Interactivity
3D characters can interact with their environment in more sophisticated ways. They can navigate three-dimensional spaces, perform complex actions like climbing or swimming, and interact with objects and other characters in ways that 2D art production cannot.
Customizability
3D models offer greater opportunities for customization. Players can often modify a character’s appearance, outfits, and even their body structure. This customization enhances player engagement and allows for more personalized gaming experiences.
Lighting and Shadows
3D characters cast and react to shadows and light, adding to the realism. Advanced lighting techniques, such as ambient occlusion and dynamic shadows, make the characters feel more integrated into the game environment.
AI Art in Character Design
The integration of AI in character design is revolutionizing the way artists and game developers create and refine characters. By leveraging the power of AI, designers can explore new creative horizons, streamline their workflows, and produce high-quality art with greater efficiency.
- Automating Repetitive Tasks AI tools can handle repetitive and time-consuming tasks, such as generating multiple character variants, creating intricate patterns, or even automating colorization. This allows artists to focus more on the creative aspects of character design, such as conceptualizing and refining unique character traits and personalities.
- Generating Inspiration and Ideas AI can serve as a valuable source of inspiration by generating a wide range of design concepts based on a set of parameters or inputs. Artists can use these AI-generated concepts as a starting point, selecting and refining ideas that align with their vision. This can significantly speed up the brainstorming and ideation phase of character design.
- Enhancing Artistic Skills AI tools equipped with machine learning algorithms can analyze and learn from vast amounts of artistic data. By studying the techniques and styles of master artists, AI can assist designers in improving their own skills, suggesting improvements, and offering real-time feedback. This creates a collaborative environment where AI acts as both a tool and a mentor.
- Creating Consistency Across Designs In projects that require a cohesive look and feel across multiple characters, AI can help maintain consistency in style, proportions, and color schemes. By using AI to standardize certain design elements, artists can ensure that all characters fit seamlessly within the same visual universe, enhancing the overall aesthetic of the project.
- Expanding Accessibility AI art tools make character design more accessible to individuals who may not have formal training in art. These tools can simplify complex processes, allowing anyone with a creative idea to bring their characters to life. This democratization of character design opens up new opportunities for diverse voices and perspectives in the creative industry.
- Exploring New Creative Territories AI-driven design tools can push the boundaries of traditional character design by experimenting with novel styles, forms, and concepts that may not have been considered by human designers. This can lead to the creation of unique and innovative characters that stand out in a crowded market.
- Case Studies and Applications Several industries are already benefiting from AI in character design. In video games, AI is used to quickly generate a diverse array of NPCs (non-playable characters), each with distinct appearances and behaviors. In animation and film, AI assists in creating detailed and lifelike characters, speeding up the production process. Fashion and advertising also use AI to design virtual models and avatars, enhancing marketing campaigns and customer engagement.
In conclusion, AI art in character design offers a myriad of benefits, from automating mundane tasks to providing creative inspiration and enhancing artistic skills. By embracing AI, designers can unlock new levels of creativity and efficiency, ultimately pushing the boundaries of what is possible in character design.
Adapting 3D Character Design for Different Platforms
Creating 3D characters that perform well across different platforms—mobile, console, and PC—requires tailoring the design and optimization processes to each platform’s unique constraints and capabilities.
Mobile
Mobile platforms demand low-poly models with efficient texture mapping to ensure smooth performance on devices with limited processing power. Techniques like normal mapping and simplified rigs are often used to maintain visual quality while reducing resource consumption.
Console
Console platforms offer more processing power, allowing for higher-resolution textures, detailed models, and complex animations. Character designs for consoles often emphasize intricate details like facial expressions and dynamic clothing physics to enhance immersion.
PC
PC platforms provide the most flexibility, catering to both low-end and high-end configurations. For high-end systems, designers can push the boundaries with ultra-high poly counts, ray-traced lighting effects, and realistic shaders. However, scalability is key: characters should also be optimized for performance on less powerful setups without compromising the core visual experience.
By understanding the unique requirements of each platform, designers can create characters that deliver exceptional visual fidelity while ensuring seamless performance.
3D Character Design for Different Genres
Different game genres call for distinct approaches to 3D character design. A character’s proportions, details, and materials all need to fit the world they inhabit.
In realistic genres like RPGs and action-adventure games, high-detail models with accurate anatomy and lifelike textures are essential. These characters often feature complex shading, realistic cloth physics, and subtle facial expressions to enhance immersion. In contrast, stylized genres, such as fantasy and platformers, focus on exaggerated proportions and bold shapes to create visually striking silhouettes. Cartoony games often use fewer details and simplified textures, allowing for more expressive animations.
Sci-fi characters tend to have sleek designs with metallic surfaces, glowing elements, and high-tech accessories, while fantasy characters feature intricate armor, flowing robes, and ornate decorations. Horror games lean toward grotesque, unsettling designs that distort anatomy to evoke fear. The key to successful 3D character design across genres is understanding the visual language that defines each one.
Worldbuilding Through 3D Character Design
3D character design does more than create playable avatars. It helps build the world itself. Every character’s outfit, posture, and even material choices tell a story about the environment they come from.
A well-designed character should reflect their culture, social status, and role in the game. For example, a knight from a ruined kingdom might wear dented armor and tattered cloth, while a cyberpunk hacker would have a sleek, minimalist outfit with neon accents. Even small details like dirt on boots or scratches on armor add layers to a game’s world.
The materials used in a character’s design also influence immersion. Heavy, metallic armor feels different from lightweight fabric, and characters in a desert setting should have dusty, sun-bleached outfits. Thoughtful 3D character design ensures that each model feels like a natural part of the world rather than just an asset placed into it.
Top 3D Character Creators in the Market
Creating compelling 3D characters is a central part of modern game design, animation, and digital storytelling. Whether you are a solo developer, a professional studio artist, or a hobbyist, the right character creation software can significantly speed up your workflow while improving visual quality. Here are some of the top 3D character creators currently available, each offering its own strengths and focus.
Reallusion Character Creator
Reallusion’s Character Creator is a powerful, full-featured tool designed for game development, animation, and digital humans. It integrates seamlessly with iClone and Unreal Engine, making it ideal for real-time production pipelines. Users can customize every detail of a character, from facial structure and body shape to clothing and textures, all with a professional-grade interface.
The software supports realistic PBR shading, automatic rigging, and facial morphing, offering tools for performance capture and animation export. It is frequently used in professional studios due to its compatibility with industry standards and its support for high-resolution assets.
Character Creator stands out for its balance between usability and depth. Artists can quickly generate lifelike characters ready for animation, making it a go-to for creators who want both control and efficiency.
Eldritch Foundry
Eldritch Foundry is a niche character creator designed primarily for tabletop RPG players and fantasy enthusiasts. It allows users to build highly detailed miniatures that can be exported for 3D printing or used in digital renders. While not as robust as other tools in terms of animation or rigging, its stylized assets and user-friendly interface make it appealing for specific artistic goals.
The system offers a growing library of fantasy-themed parts, gear, and poses. Users can adjust proportions, tweak facial features, and design accessories with ease. It is less suited for full game production but works well for stylized concept art or avatar creation.
Eldritch Foundry succeeds in delivering visual personality and character-driven storytelling through its designs. It excels in speed and focus, making it a strong tool for visual prototyping in fantasy projects.
Blender
Blender is a free and open-source 3D creation suite that includes everything from modeling and sculpting to animation and rendering. For character creation, Blender is a favorite among artists who want full creative control. It does not offer the same streamlined experience as dedicated generators, but its flexibility is unmatched.
Users can sculpt characters from scratch, rig them manually or with auto-riggers, and apply complex materials or shaders. Blender’s active community has produced hundreds of plugins, including character-focused add-ons like MB-Lab and Rigify.
While the learning curve is steeper, Blender’s depth and customizability make it one of the most powerful tools available for serious creators.
Meshy
Meshy is a newer entry in the 3D character creation space, with a strong focus on speed, AI-assisted modeling, and browser-based convenience. It allows users to generate stylized or semi-realistic 3D characters quickly, without needing deep experience in 3D modeling. Because of its web-based platform, Meshy is accessible from anywhere and does not require heavy installation or GPU power.
What sets Meshy apart is its emphasis on simplicity and rapid iteration. The character creation workflow is minimal but intuitive, offering sliders and presets for body shape, clothing, facial features, and pose. While it may not yet match the depth of tools like Blender or Character Creator, it offers impressive results for prototyping and indie-level production.
For developers looking for fast concept visualization or lightweight assets for stylized games, Meshy can be a time-saving solution. Its clean UI and cloud-based approach make it particularly appealing to beginners or small teams looking to avoid complex pipelines.
Daz3D
Daz3D is a long-standing platform for creating photorealistic 3D human characters, widely used in digital art, storytelling, and even previsualization for film and games. It offers a massive library of content—morphs, textures, poses, hair, and outfits—that can be applied to base figures with precision. The Genesis figure system is at the core of its power, allowing users to morph characters between stylized and realistic proportions with ease.
The software provides automatic rigging, posing tools, and high-quality rendering options using NVIDIA Iray, making it ideal for artists focused on realism. While it is not primarily a modeling tool, Daz3D excels at letting users kitbash and customize ready-made assets to produce striking, lifelike characters with minimal manual work.
One of Daz3D’s greatest strengths is its huge marketplace and community support. However, exporting to game engines or other pipelines often requires plugins or conversions, so it is best suited for projects that prioritize visual presentation over animation-heavy workflows.
MakeHuman
MakeHuman is an open-source character creation tool focused on realistic human models, with a strong emphasis on anatomical accuracy and freedom for researchers, artists, and developers. It is not as feature-rich as some commercial alternatives, but it offers complete control over age, gender, ethnicity, and body structure without licensing restrictions.
The interface is clean and functional, offering sliders for detailed customization and support for posing, rigging, and exporting. Models can be easily transferred into Blender or other programs for further editing, rigging, or animation. While the asset library is limited compared to Daz3D or Character Creator, its output is solid for those who want realistic base meshes.
MakeHuman’s strength lies in education, prototyping, and use in open projects. For those seeking a cost-free entry point into character modeling or for teams needing customizable base meshes with clear usage rights, it remains a valuable and respected tool.
The Future of 3D Character Design
The future of 3D character design holds exciting possibilities driven by technological advancements and evolving creative trends. With the integration of artificial intelligence (AI) and machine learning, designers can expect streamlined workflows and enhanced character customization. AI-powered tools may facilitate the generation of personalized 3D characters based on user preferences, catering to individualized marketing strategies. Additionally, the convergence of 3D character design with virtual and augmented reality technologies is likely to redefine immersive brand experiences.
As these technologies become more accessible, interactive storytelling through lifelike 3D characters could revolutionize how audiences engage with brands. The future may see a shift towards more inclusive and diverse character representation, reflecting the growing importance of authenticity and inclusivity in marketing narratives. Overall, the future landscape of 3D character design is dynamic, promising innovative approaches that will shape the visual language of marketing campaigns in the digital era.
How Polydin Creates Unique and Engaging 3D Characters
Polydin Studio excels in creating unique and engaging 3D characters through a meticulous and innovative process. The studio combines various 3D techniques, including sculpting, UV mapping, and texturing, to craft visually stunning characters. Sculpting is a key step where Polydin’s artists use tools like ZBrush to add intricate details such as skin pores, wrinkles, and muscle definition. This helps bring our characters to life with a natural, organic feel. Beyond physical realism, Polydin also focuses on how the character’s anatomy interacts with animation, ensuring smooth movements that feel believable.
Another core aspect is UV mapping, where the character’s 3D mesh is unwrapped to allow textures to be applied without distortion. This leads into the texturing process, where elements like clothing, skin, and accessories are given visual depth and realism through digital painting and the application of surface details. Shading, another crucial part of the process, enhances the character’s lifelike quality by simulating how light interacts with its surfaces, adding depth and drama to the design.
Through this structured and detailed approach, Polydin Studio consistently delivers 3D characters that not only look impressive but also fit seamlessly within the interactive environments of video games or animations. Our dedication to balancing realism with creative vision sets their 3D characters apart, helping us engage players and audiences on a deeper level.